Started a blog on Blogger or knowledge is not very deep with Blogger, welcome to this article. In this article I am writing about 4 important tutorials about Blogger (Of course nothing deep, more like general subjects you’ll question about) hope these tutorials will help your Blogging with Blogger. Subjects are:
Read on-
Creating Category in Blogger
You can categorize your posts in Blogger as the way you want. This categorizing option known as ‘Label’ in Blogger system;
- While you writing/editing a post, at right side bar ‘Post setting’ contain the option ‘Label’,
- Your Labelled post will be shown in label links like- http://your site.blogspot.com/search/label/blogger
Creating Navigation menu on Blogger blog
Navigation menu is an important part of site; it gives you access to anywhere of a site very easily. Blogger does not have default navigation menu on templates, what it offers that function have ability to show pages name in nav area. But this menu can be created within Blogger resource. To do that follow this tutorial:
- Log in to your Blogger, select your blog
- Go to ‘Layout’ tab, select ‘add a gadget’ (Below Header)

- From Pop-up menu select ‘Link List’
- Configure your navigation menu with your suitable label links, pages links also name them. And click ‘Save’
Now you will have a simple Navigation menu on your Blogger site. Looking for more functional (Dropdown menu, Floating style, Social icon enabled nav menu) follow this
tutorial,
this and
this one.
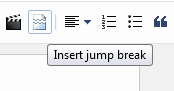
What is Jump break, What it does
Every beginner asks this question (even I asked back that time) ‘What is Jump break’. In Blogger’s post editor you may find this function Jump break. This is a simple function design to make your Homepage enrich and clean,
- Allows you to fit more posts on Homepage by creating jump links (Read more option), Gives your visitors a quick view of your posts and generate more pageviews.
- Jump break also create read more option in Feedburner email subscription. Whoever subscribes your blogs feed via Feedburner, those email readers doesn’t get the full version of the post on mail, get jump break’s before post summary, that leads you to more pageviews.
How to enable it:
- After your completed post editing, in post (where you want to enable it) hit a left click.
- And now click on ‘Jump break’ and where you clicked in post a dotted line will appear.
- After publish the post, check your blog out for confirm it working.
Verify your Blogger blog on Pinterest
Pinterest is a very popular social media site and almost every blogger, online entrepreneur maintains Pinterest account. You may be noticed that Pinterest have an option to insert your site’s address. And you may also know that a verified web address on Pinterest gives you a
powerful do-follow backlink. So how to verify your blogger blog on Pinterest explained here. Read on-
- Log in to Pinterest account, select ‘Edit Profile’
- In website field insert your website address, Hit ’Verify Website’
- Copy the code of ‘How to verify’ box,
- Now, on a new tab: Log in to your Blogger, select your blog
- Go to ‘Template’ tab, select ‘Edit HTML’
- In code snippet search for <head> (using CTRL+F or CMD+F)
- Below <head> paste copied line of code
- Go back to old tab ‘Pinterest setting’
- Hit ‘Complete verification’
And now your Blogger blog will be show verified on your Pinterest account
More beginner tutorials will be release soon, If you interested and found something helpful subscribe and get notified when new posts releases. Goodluck……


.png)


