Monday, April 20, 2015

Add Foldable Sharing Widget below posts of Blogger

Add Foldable Sharing Widget below posts of Blogger
Previously I had published lots of Social Sharing/Bookmarking widget what appears below every post of your Blogger bogs. Few of them are Truck icon style, Elegant silver icon style, Share with counter + Feedburner email subscription, Coldblooded sharer etc. To continue that sharing widgets making and publishing here I am publishing another super smart compact Social Share/bookmarking widget. This widget created with HTML, CSS and CSS3. Got 8 slots of service (Facebook, Twitter, Google plus, Stumble upon, Pinterest, Delicious, Reddit and a Feedburner email subscription slot), Easy to add on your blogger blog. This widget will look cool on any site no matter what kind of site they are. Let’s see how it looks like and how to add it on your site.

Add Foldable Sharing Widget below posts of Blogger


Preview-

Live Demo- (Click here)

How to add-

Step 1: Back up your template(Optional step)
  • Log in to your blogger, select your blog,
  • Select 'Template' tab option, click 'backup/restore' from upper right corner.
  • Download full template and save it on your pc's Harddrive

Step 2: Then, Installing (Mandatory step)
  • From 'Template' tab, select 'Edit html'
  • And find (using CTRL+F) or (CMD+F) this line-
<div class='post-footer-line post-footer-line-1'>
  • You may find this code phrase twice, ignore first phrase, after second phrase paste all given codes. 
<!--crawlist.net sharer starts-->
<div class="ks-koolsharer">
    <input type="checkbox">
    <label data-default="Share This Post!" data-focus="Select one of the social media service..."></label>
    <ul>
<li><a class="facebook" expr:href='&quot;http://www.facebook.com/sharer.php?u=&quot; + data:post.url + &quot;&amp;t=&quot; + data:post.title' rel='external nofollow' target='_blank'>Facebook</a></li>
<li><a class="twitter" expr:href='&quot;http://twitter.com/?status=&quot; + data:post.title + &quot; - &quot; + data:post.url ' rel='nofollow' target='_blank'>Twitter</a></li>
<li><a class="google" expr:href='&quot;http://plus.google.com/share?url=&quot; + data:post.url + &quot;&amp;title=&quot; + data:post.title' rel='nofollow' target='_blank'>Google+</a></li>
<li><a class="stumble" expr:href='&quot;http://www.stumbleupon.com/refer.php?url=&quot; + data:post.url + &quot;&amp;title=&quot; + data:post.title' rel='external nofollow' target='_blank'>Stumble upon</a></li>
<li><a class="pinit" expr:href='data:post.sharePostUrl + &quot;&amp;target=pinterest&quot;' expr:title='data:top.shareToPinterestMsg' target='_blank'>Pinterest</a></li>
<li><a class="delicious" expr:href='&quot;http://delicious.com/post?url=&quot; + data:post.url + &quot;&amp;title=&quot; + data:post.title' rel='external nofollow' target='_blank'>Delicious</a></li>
<li><a class="reddit" expr:href='&quot;http://reddit.com/submit?url=&quot; + data:post.url + &quot;&amp;title=&quot; + data:post.title' rel='external nofollow' target='_blank'>Reddit</a></li>
<li><a class="feed" href='http://feeds.feedburner.com/you' target='_blank'>Subscribe</a></li>
</ul> </input> </div> <!--crawlist.net sharer ends-->
<style>/*crawlist.net css starts*/
.ks-koolsharer {
  display:inline-block;
  font:normal bold 12px Arial,Sans-Serif;
  position:relative;
  width:300px;
  background-color:#111;
  text-align:left;
  background-image:linear-gradient(top,rgba(255,255,255,.4) 0%,rgba(255,255,255,.2) 50%,rgba(255,255,255,0) 50%,rgba(255,255,255,.1) 100%);
  filter:progid:DXImageTransform.Microsoft.gradient(gradientType=0,startColorstr='#333333',endColorstr='#111111');
  border-radius:7px;
  box-shadow:inset 0 1px 1px 1px rgba(255,255,255,.1), 0 1px 3px rgba(0,0,0,.7);
  float:right;
}
.ks-koolsharer:before,
.ks-koolsharer:after {
  content:"";
  display:block;
  width:0;
  height:0;
  border:3px solid transparent;
  border-width:5px 3px;
  border-bottom-color:#999;
  position:absolute;
  top:25%;
  right:5px;
  z-index:4;
}
.ks-koolsharer:after {
  border-color:#999 transparent transparent;
  top:auto;
  bottom:25%;
}
.ks-koolsharer input {
  display:block;
  position:absolute;
  top:0;
  right:0;
  bottom:0;
  width:15px;
  height:100%;
  opacity:0;
  z-index:10;
  cursor:pointer;
}
.ks-koolsharer label {
  display:block;
  line-height:45px;
  color:rgba(255,255,255,.5);
  padding:0 15px;
  transition:all 0s ease-out;
}
.ks-koolsharer label:before {
  content:attr(data-default);
}
.ks-koolsharer label:after {
  content:"";
  display:block;
  position:absolute;
  top:0;
  right:0;
  bottom:0;
  width:15px;
  border-left:1px solid rgba(0,0,0,.4);
  border-radius:0 7px 7px 0;
  box-shadow:inset 1px 0 0 rgba(255,255,255,.1),-1px 0 0 rgba(255,255,255,.1);
}
.ks-koolsharer input:hover + label {
  color:white;
}
.ks-koolsharer input:hover + label:after {
  background-color:rgba(255,255,255,.04);
}
.ks-koolsharer ul {
  margin:0 0;
  padding:0 0;
  position:absolute;
  top:100%;
  left:14px;
  right:14px;
  background-color:#222;
  border:1px solid #111;
  box-shadow:0 1px 2px rgba(0,0,0,.4),0 5px 7px -2px rgba(0,0,0,.4);
  visibility:hidden;
  opacity:0;
  z-index:99;
}
.ks-koolsharer li {
  margin:0 0;
  padding:0 0;
  list-style:none;
  float:left;
  width:50%;
  display:inline;
}
.ks-koolsharer a {
  display:block;
  position:relative;
  color:#999;
  text-decoration:none;
  text-shadow:0 0 2px black;
  line-height:30px;
  border-top:1px solid #111;
  border-right:1px solid #111;
  padding:0 15px 0 32px;
  box-shadow:inset 0 0 0 1px #333;
  border-radius:1px;
}
.ks-koolsharer a:nth-child(even) {
  border-right-width:0;
}
.ks-koolsharer a:before {
  content:"";
  display:block;
  width:16px;
  height:16px;
  position:absolute;
  top:7px;
  left:7px;
  background-color:transparent;
  background-repeat:no-repeat;
  background-position:50% 0;
}
.ks-koolsharer a:hover:before {
  background-position:50% 100%;
}
.ks-koolsharer .facebook:before {background-image:url('https://blogger.googleusercontent.com/img/b/R29vZ2xl/AVvXsEg8HY0kDQPMpHhNqlAM-ME50OL8p3mjqZkNVKuYmmJ1FY4s3QL1y23-5ab9fHGiufsc8wZavidSrCWlN33ZxVY-fA5dKyoOunVDr-VkK23WoETuuc-1-p_9seK0lw4-FpjQ09e0EZlFXsd4/s1600/facebook-16x16.png')}
.ks-koolsharer .twitter:before {background-image:url('https://blogger.googleusercontent.com/img/b/R29vZ2xl/AVvXsEiumvza8DW94QzEsPTOiwTX6ScKEq-y-b7qifN1y9TLMeHf5ySAnZLpfkYu_JYsZb-eTxv1Z7iHH1qwUhu3PceO6aAtLSRTqnNLMzYjbryyB3hO-EFLWn2SXfRUa3CFAg4wmzjdZxIk6-56/s1600/twitter-16x16.png')}
.ks-koolsharer .google:before {background-image:url('https://blogger.googleusercontent.com/img/b/R29vZ2xl/AVvXsEh33283js2L8fELaEVFnHv4cE_vnVZM-ukJIag8X1R-FPal8P5qpbrJmEiRV29CGAAQ788TX1F6_fl8i93n2jFcvhs-wJHxRfH7AU8a36ielKvDB6b7P2LOZInaDcZ0btKQui0mcvOjIkLb/s1600/google+-16x16.png')}
.ks-koolsharer .stumble:before {background-image:url('https://blogger.googleusercontent.com/img/b/R29vZ2xl/AVvXsEi_w6ATpEHziEsrquaUBN67iW6Cc0l5Ts1azvmkX5tDdslRO-3HBRfB8YdEKfQpq_TptSJl8MolX-VaB_XZDU8XCrQ3NWO9brfTm64KpT_DLar4pZSaaS4mQgilYpY32htDbdVaAmwMqtLC/s1600/stumbleupon-16x16.png')}
.ks-koolsharer .pinit:before {background-image:url('https://blogger.googleusercontent.com/img/b/R29vZ2xl/AVvXsEi0iBCjqPtEp8LoP1_HslZyD_NmbZNcU1XDz4OqOX9qShMgGNXAsq6jiS3WuAmJcAe69Ue1oSwbrYSeMVOpLmoATOwgwYjFwdYDcwjzCRSB0E04brDa8e8enLTlZiy6NgQVC-FnyYDu4gjz/s1600/pintrest-16x16.png')}
.ks-koolsharer .delicious:before {background-image:url('https://blogger.googleusercontent.com/img/b/R29vZ2xl/AVvXsEjLbBaEO25dHvvW_SXlYqI0rk8cjOOTNhBBnauuQ-Jj6DR6xZsSgLxlwK0LSCO5unGg19VY_Os4EmP3REoo8jWNRgC0J6ZASwLrYL5Jj8vENt9e5UanG2FB_QleLe6SGLVdqrVaF9nvRAZe/s1600/delicious-16x16.png')}
.ks-koolsharer .reddit:before {background-image:url('https://blogger.googleusercontent.com/img/b/R29vZ2xl/AVvXsEgyAS2aiQ8adPEscdFefUdHO8Kpzq7x6r44SjsbSuO5WdDKka_KtSfZkHGWkfEjrW_GgCQnI-z7ThpjvBRzjf8ot6se5eBxIuoXNtV-JyAxl-QIvhZsQK-8uAB4lVSf7gEYejG61ZwQ73yZ/s1600/reddit-16x16.png')}
.ks-koolsharer .feed:before      {background-image:url('https://blogger.googleusercontent.com/img/b/R29vZ2xl/AVvXsEiazm28g_bbSEmim5aXoZ-DxZ2GsGZfT9_DcLFvfi9kfXW2KlbCqQI4eqMpHXNrD05nzMPl935oOVmtkzBS-_sHC6lWLW7QBjmXM4yjiWN2ZdI266uuJVFBOAAjfgPtehdvtBZLnkxAGck5/s1600/feed-16x16.png')}

.ks-koolsharer a:hover {
  background-color:rgba(0,0,0,.2);
  color:#ccc;
}
.ks-koolsharer input:checked + label {
  color:rgba(255,255,255,.4);
  transition-duration:.4s;
}
.ks-koolsharer input:checked + label:before {
  content:attr(data-focus);
}
.ks-koolsharer input:checked + label:after {
  background-color:rgba(0,0,0,.2);
  box-shadow:inset 1px 0 1px rgba(0,0,0,.4),-1px 0 0 rgba(255,255,255,.1);
}
.ks-koolsharer input:checked ~ ul {
  visibility:visible;
  opacity:1;
}/*crawlist.net css ends*/
</style>
Configure:
  • To configure the Feedburner email subscription, place your Feed Id in the red marked link.
  • Finally Save Template; Check out your Blog for live action.

Template Capability and Faq
  • This widget is compatible with almost all stranded templates, but unique designed templates or highly coded templates will not accept this. 
  • If your template build with HTML5/Following tutorial fails to show the widget on blog; then search </article> instead of <div class='post-footer-line post-footer-line-1'> And paste all codes after </article>
How it looking in your Blogger blogsite don't forget to mention, Any feedback don’t forget to mention too. Goodluck…..

Wednesday, April 1, 2015

9 Best software to add Watermark on images

9 Best software to add Watermark on images
We always want to protect our images from being copied, misused and stolen. To protect our images using watermark on images is very popular. Placing watermark on images we basically use Adobe Photoshop, but when time runs short we always want a smarter way. Watermarking software makes that job easier that time. Here such time saver, easy user interface base, multiple functions offering best watermarking software listed. Let’s read, download ‘em and start watermarking your images:-

9 best software to add watermark on images easily

uMark Image Watermarking Software, is a free and paid ($29) software for watermarking your digital images with a name, logo, or a copyright notice.
  • Batch Watermarking supports Watermark hundreds of photos in one go.
  • Add various shapes and fill them with solid or gradient colors. Add QR codes as watermark on your photos
  • Border and shadow Applicable
  • Fully Customizable Watermarks choose the font, font size, style and color for your watermarks. Set custom transparency level, add shadows or rotate watermarks to your taste.
  • Select from one of the 9 predefined positions to place your watermark or put the watermark at your desired location on the image by specifying top, left coordinates or by drag and drop.
  • Add EXIF and other metadata as watermarks (geo tagging)
  • Save Watermarks for Later Use
  • Windows PC (Requires .Net 4 framework) or a Mac. uMark is available
  • uMark supports 8 languages - Dutch, English, French, German, Italian, Portuguese, Spanish and Turkish.
Mass Watermark is a free and paid ($30) software to Add Text or Image Watermarks to a collection of Images with Few Clicks
  • Automated Batch Image Watermarking in a simple, fast and Unified Workflow, Watermark 100s of Photos within Minutes with few Clicks
  • Batch/Individual Resize Images to meet Web standards
  • Retouch your Images before Watermarking with unique Image Optimizer
  • Create your own Branding Watermark with Custom Text and Custom Logo, Special effects for text watermarks
  • Supports Wide Range of image formats JPEG,PNG,BMP,TIFF and GIF
  • Inbuilt Watermark Designer
  • MetaData adder
  • Direct Upload to Flickr, Picasa
  • Create Zip file (This is Ideal for Upload to Websites via FTP and Unzipping at the Website Side)
  • Line Watermarking, Save Watermark Templates
Aoao Watermark for Photo is an easy to use Photo Watermark Software provides professional photo protection solutions for your digital photos. It’s paid ($30-$200) software, trial available.
  • Zero Image Quality Loss and Faster Speed
  • Batch watermarking - watermarking 300 photos less than 1 minute
  • Full control over placement and size of your photo watermark
  • Awesome watermark library – 150 + free watermark materials
  • Text Watermark:  Add text watermark to photo, the text can be signature, date, EXIF info, copyright symbols © ® ™, etc.
  • Image Watermark:  Add image watermark to photo with logo, avatar, icon, etc. Many free image watermarks are offered to users
  • Animated GIF Unique Feature: Enable to add watermark to animated GIF image and keep its dynamic effects.
  • Photo Frame:  Provide free frame materials with different styles like oil painting style, modern style, etc
  • Crop Photo, Resize Photo, Batch renaming,
  • Photo Conversion: Easily convert photo files among all popular formats like JPG, GIF, BMP, TGA, PNG, etc.
Visual Watermark is a free and paid ($20-$40) watermarking software with lot’s of features and function,
Watermark 100 Photos in Just 1 Minute
  • 12 built-in watermark templates and appearance options help you get the watermark look you want.
  • Batch Rename and resize features make publishing images much easier.
  • Runs on Windows and Mac
  • Use logo and text in any combination. Fill images with watermark for strong protection, or make the watermark glasslike for unobtrusive protection.
  • Choose one of 260 fonts, 66 effects and 100 transparency levels to watermark your photos with your unique watermark, software allows to change watermark size and position using visual drag-n-drop editor. 
  • Supports JPEG, PNG, TIFF, GIF and BMP photo formats.
  • Copyright Metadata, Shadow & Background enhanced
  • Integrates with iPhoto on Mac
  • Watermark Effects Visual Watermark comes with 66 effects combinations.
Arclab Watermark Studio is an easy to use image watermarking software to add visible and transparent watermarks to multiple images and photos in a batch. It comes up with lite version and paid version ($20-$50)
  • Add a true-transparency watermark with custom opacity
  • Watermark or logo could be added at any position
  • Add a watermark on multiple positions
  • Flood-Fill with custom watermark size (mosaic)
  • Batch processing of directory structures
  • The image conversion software support jpeg, png, gif, tiff, bmp and psd images and can convert the images into the image formats jpeg, png, gif, tif and bmp.
WatermarkLib software is a free professional digital photo watermark creator
  • This photo watermark software places very strong watermarks that no one can remove.
  • Batch mode: protect a photo group of any size at a time.
  • Edit watermarks in a convenient interface.
  • Create watermarks out of graphics and text.
  • Make watermarks more detailed for better protection.
  • Customize font type, size, color and opacity of your watermark text
  • Support all popular image formats, including JPEG, JPG, GIF, BMP, PNG, TGA, TIFF.
  • Add Date and Time Stamp
Alamoon Watermark is powerful watermarking software for protecting and enhancing your images. Paid version available ($30)
  • Simple yet effective software helps you to watermark thousands of photos/images in seconds.
  • Alamoon Watermark supports major picture format like: JPEG, BMP, TIFF, PCX, PNG, TGA, PBM, PGM, PPM, GIF, VDA, ICB, VST, PIX, WMF, FAX, PSD, PDD, PSP, CUT and PCD Image Formats.
  • Watermark with visible text, logo, or URL
  • Add date-stamp to your photos
Simple and quick Watermarking Software. Comes up with lite version and paid version ($30-$100)
  • Batch watermark thousands of photos without user action.
  • Photos can be watermarked with a text, logo, photo, or picture
  • Customizable options for color and style of text to use for watermarking
  • Resizing option for logos/images used to watermark the image/photo
  • Output of watermarked photos to: JPEG, TIFF, PNG, BMP, GIF file format
  • Border design addition to the watermarked text
  • Support for storing of METADATA information
  • The EXIF file information can be embedded or retrieved
  • Create solid watermarks that are hard to remove.
  • Retain or Reject EXIF information in JPEG images.
  • Options to maintain a single or a separate destination directory for all batch-watermarked images
  • Innovative one click upload for Facebook, Wordpress and FTP
Kigo Image Converter is a free and easy to use image converter for Windows users.
  • It is designed to change image format, scale image size, compress image and add watermark by batch. 
  • This free image converting tool supports kinds of image formats, which include BMP, JPG, J2K, JPC, PNG, TIF, TIFF and more. 
  • With the image converter's main functions, you can find the right solutions to convert images for different situations.
Image watermarking is important for reserving copyrights of your images. Who when going to re-use your images without permission you’ll never know. That’s why using a suitable watermarking software is recommended for everybody who shares images on web. So which one you use/you are going to use don’t forget to mention by comment.

Sunday, March 8, 2015

How to disable Comment on Blogger/Or specific posts

How to disable Comment on Blogger/Or specific posts
Comment is the most important part of blogsites. This option completes the whole blogging system. Creates opportunity to connect author and reader instantly and gives author the feedback of their writings. In ‘Blogger’ platform Comment system comes by default/build-in. And Blogger blog visitor can leave their comments, but not all types of sites/posts needs the comment function. In that case this Comment function can be switched off easily. And how to do that? Read on-

How to disable Comment on Blogger


This tutorial will disable all the comment form of your Blogger blog. For doing that follow these steps;
  • Log in to Blogger, select your blog
  • Go to ‘Setting’ tab, select ‘Posts and comments’
  • On ‘Posts and comments’ page, you will find option called ‘Comment location’
  • Select ‘Hide’ from dropdown, ‘Save settings’

disable Comment on Blogger
  • After these entire things done successfully, Comment form will be disappear.
 

How to disable Comment on specific posts/page


This tutorial will disable Comment on specific post/page. Those post/pages like (About us/Contact us/Terms of service/Privacy policy) where you don’t need comment form this tutorial will help you to do that;
  • Log in to Blogger, select your blog
  • Go to ‘All posts’/’Pages’ tab
  • Select ‘Edit’ on your desired post/page
  • In ‘Post editor’ tab, from right sidebar ‘Post setting’, select ‘Option’
  • Select and Save from choices (Allow/Don’t allow show existing/ Don’t allow hide existing) of ‘Readers Comment’ option
disable Comment on specific posts

  • After these entire things done successfully, Comment form will be disappear from selected post/page.
Any question/feedback about this tutorial drop with a comment, I didn’t disable my comment system : p New tutorial will be release soon stay subscribed. Chill……..

Friday, March 6, 2015

4 Important Tutorials for Blogger beginners

4 Important Tutorials for Blogger beginners
Started a blog on Blogger or knowledge is not very deep with Blogger, welcome to this article. In this article I am writing about 4 important tutorials about Blogger (Of course nothing deep, more like general subjects you’ll question about) hope these tutorials will help your Blogging with Blogger. Subjects are:

  • Creating Category
  • Creating Navigation menu
  • Using Jump break
  • Verify Blog on Pinterest

Read on-

Creating Category in Blogger
You can categorize your posts in Blogger as the way you want. This categorizing option known as ‘Label’ in Blogger system;
  • While you writing/editing a post, at right side bar ‘Post setting’ contain the option ‘Label’, 
  • Your Labelled post will be shown in label links like- http://your site.blogspot.com/search/label/blogger

Creating Navigation menu on Blogger blog
Navigation menu is an important part of site; it gives you access to anywhere of a site very easily. Blogger does not have default navigation menu on templates, what it offers that function have ability to show pages name in nav area. But this menu can be created within Blogger resource. To do that follow this tutorial:
  • Log in to your Blogger, select your blog
  • Go to ‘Layout’ tab, select ‘add a gadget’ (Below Header)

Creating Navigation menu on Blogger blog

    • From Pop-up menu select ‘Link List’
    • Configure your navigation menu with your suitable label links, pages links also name them. And click ‘Save’
      Creating Navigation menu on Blogger blog
    Now you will have a simple Navigation menu on your Blogger site. Looking for more functional (Dropdown menu, Floating style, Social icon enabled nav menu) follow this tutorial, this and this one.

    What is Jump break, What it does
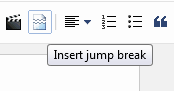
    Every beginner asks this question (even I asked back that time) ‘What is Jump break’. In Blogger’s post editor you may find this function Jump break. This is a simple function design to make your Homepage enrich and clean,
    • Allows you to fit more posts on Homepage by creating jump links (Read more option), Gives your visitors a quick view of your posts and generate more pageviews.
    • Jump break also create read more option in Feedburner email subscription. Whoever subscribes your blogs feed via Feedburner, those email readers doesn’t get the full version of the post on mail, get jump break’s before post summary, that leads you to more pageviews.
    How to enable it:
    • After your completed post editing, in post (where you want to enable it) hit a left click. 
      What is Jump break, What it does
    • And now click on ‘Jump break’ and where you clicked in post a dotted line will appear. 
    • After publish the post, check your blog out for confirm it working.

    Verify your Blogger blog on Pinterest
    Pinterest is a very popular social media site and almost every blogger, online entrepreneur maintains Pinterest account. You may be noticed that Pinterest have an option to insert your site’s address. And you may also know that a verified web address on Pinterest gives you a powerful do-follow backlink. So how to verify your blogger blog on Pinterest explained here. Read on-
    • Log in to Pinterest account, select ‘Edit Profile’
    • In website field insert your website address, Hit ’Verify Website’
    • Copy the code of ‘How to verify’ box,
    • Now, on a new tab: Log in to your Blogger, select your blog
    • Go to ‘Template’ tab, select ‘Edit HTML’
    • In code snippet search for <head> (using CTRL+F or CMD+F)
    • Below <head> paste copied line of code
      Verify your Blogger blog on Pinterest
    • And ‘Save template’
    • Go back to old tab ‘Pinterest setting’
    • Hit ‘Complete verification’
    And now your Blogger blog will be show verified on your Pinterest account

    More beginner tutorials will be release soon, If you interested and found something helpful subscribe and get notified when new posts releases. Goodluck……

    Wednesday, March 4, 2015

    Add Nav Menu to Blogger (Dropdown, Floating/Fixed to Header, Social icons)

    Add Nav Menu to Blogger (Dropdown, Floating/Fixed to Header, Social icons)
    Navigation menu is an important part of any site. It helps to highlight categories, pages and make easy to surf within your site/blog. Blogger seems to have no Navigation menu by default; all you can do is highlighting some pages in navigation menu area. But also Blogger does not have any restriction to add custom navigation menu! So Here I presenting a custom navigation menu, this menu’s design inspired by multipurpose element on menu. This menu offers:
    • Dropdown function: allow you to add many links
    • Have cool Social media icons: allow you to add 5 different profiles (Facebook, Twitter, Google plus, LinkedIn, RSS Feed)
    • Fixed to header/Floating style: when the page scroll to down this menu stays on the top its own position
    This Floating navigation menu made with light weight HTML, CSS and enhanced with CSS3 effects, Google font, 3d icons. Design to Load faster, adapt to any template looks damn good on any designed template, modern-attractive-stylish design and cross browser support. Let’s see how it looks like and how to add it to your Blogger blog.

    Add Multipurpose Navigation Menu to Blogger


    Preview-
    Add navigation Menu to Blogger (Dropdown, Floating/Fixed to Header, Social icons)

    Live Demo- Click here

    Codes for copy-

    <link href='http://fonts.googleapis.com/css?family=Droid+Serif' rel='stylesheet' type='text/css'/>
    <style>
    /*crawlist.net CSS starts*/
    #ks-meno{
    width:100%;
    height:45px;
    display:block;
    padding:0;
    margin:0 0 22px 0;
    z-index:100;
    top:0px;
    left:0px;
    position:fixed;
    box-shadow:2px 2px 5px  #444444;
    -moz-box-box-shadow:2px 2px 5px  #444444;
    -web-kit-box-shadow:2px 2px 5px  #444444;
    -goog-ms-box-shadow:2px 2px 5px  #444444;
    background:#181818;
    }

    #ks-mano1{
      float:left;
      width:700px;
      height:40px;
      display:block;
      padding:0;
      margin-left:40px;
    }

    #ks-mano1 ul{
      float:left;
      margin:0;
      padding:0;
     border:#181818 1px hidden;

    }

    #ks-mano1 li{
      float:left;
      list-style:none;
      line-height:37px;
      margin:0;
      padding:0
      background:#181818;
      border:#181818 1px hidden;
     }

    #ks-mano1 li a, #ks-mano1 li a:link{
      color:#fff;
      display:block;
      margin:0;
      font-family: 'Droid Serif', serif;
      font-size:16px;
      padding:10px;
      text-decoration:none;
     border:#181818 1px hidden;  line-height:25px;
    }

    #ks-mano1 li a:hover, #ks-mano1 li a:active, #ks-mano1 .current_page_item a  {
      color:#fff;
      padding:10px;
      background:#6CF;
        -webkit-transition: all .6s ease;
        -moz-transition: all .6s ease;
        -o-transition: all .6s ease;
        -ms-transition: all .6s ease;
        transition: all .6s ease; border:#6CF 1px hidden;
    }
    #ks-mano1 li li a, #ks-mano1 li li a:link, #ks-mano1 li li a:visited{
      font-size: 12px;
      background:#181818;
      color: #fff;
      width: 150px;
      margin: 0;
      padding: 0px 10px;
      line-height:30px;
      position: relative;
      border:#181818 1px solid;
    }

    #ks-mano1 li li a:hover, #ks-mano1 li li a:active {
      color: #fff;border:#6CF 1px solid;
      background:#6CF;
      -webkit-transition: all .6s ease;
        -moz-transition: all .6s ease;
        -o-transition: all .6s ease;
        -ms-transition: all .6s ease;
        transition: all .6s ease;
    }

    #ks-mano1 li ul{
      z-index:9999;
      position:absolute;
      left:-999em;
      height:auto;
      width:170px;
      margin:0px;
      padding:0px
    }

    #ks-mano1 li:hover ul, #ks-mano1 li li:hover ul, #ks-mano1 li li li:hover ul, #ks-mano1 li.sfhover ul, #topks-mano1 li li.sfhover ul, #topks-mano1 li li li.sfhover ul{
      left:auto
    }

    #ks-mano1 li:hover, #ks-mano1 li.sfhover{
      position:static;
    }

    #ks-ico {
      float:right;
      width:220px;
      padding:0px 0px ;
       }
    #ks-ico img
    {
    margin-left:6px;
    margin-top:10px;
    height:28px; width:28px;
    border:none;
        -webkit-transition: all .6s ease;
        -moz-transition: all .6s ease;
        -o-transition: all .6s ease;
        -ms-transition: all .6s ease;
        transition: all .6s ease;
    }
    #ks-ico img:hover
    {
        opacity:.8;
            -webkit-transition: all .6s ease;
        -moz-transition: all .6s ease;
        -o-transition: all .6s ease;
        -ms-transition: all .6s ease;
        transition: all .6s ease;
    }
    /*crawlist.net CSS ends*/
    </style>
    <!--crawlist.net nev starts-->
      <div id='ks-meno'>
         <div id='ks-mano1'>
             <ul>
               <!--menu--><li><a href='#'>Home</a></li><!--menu-->
               <!--menu--><li><a href='#'>Categories</a><!--menu-->
                 <ul><!--submenu-->
                      <li><a href='#'>HTML</a></li>
                      <li><a href='#'>CSS</a></li>
                      <li><a href='#'>jQuery</a></li>
                      <li><a href='#'>Ruby</a></li>
                      <li><a href='#'>Python</a></li>
                      <!--submenu-->
                   </ul>
               </li>             
               <!--menu--><li><a href='#'>Portfolio</a><!--menu-->
                   <ul><!--submenu-->
                      <li><a href='#'>Biography</a></li>
                      <li><a href='#'>Work History</a></li>
                      <li><a href='#'>Refund Policy</a></li>
                      <li><a href='#'>Terms</a></li>
                      <!--submenu-->
                   </ul>
               </li>
                 <!--menu--><li><a href='#'>About us</a></li><!--menu-->
                 <!--menu--><li><a href='#'>Contact us</a></li><!--menu-->
             </ul>
          </div>
          <div id='ks-ico'>
    <a href='http://www.facebook.com/your page' target='_blank' title="Join Us on Facebook"><img src="https://blogger.googleusercontent.com/img/b/R29vZ2xl/AVvXsEjmjNyIrON-TUEOXS8HU9P7Wt2yHdx9V4p9EdyJO8h-WshUuRMGbJwCeHCZju3eDUY5PAvzh1SHiYEb2tihKtoIdayLYo4YvYkohVxWwadZjKgfQ29u-JFUc0Z5Zv_vqxvQT7ktxmY5is-s/s1600/facebook.png"/></a>

    <a href='https://twitter.com/your profile' target='_blank' title="Follow us on Twitter"><img src="https://blogger.googleusercontent.com/img/b/R29vZ2xl/AVvXsEh9tq1RZutKMqzVf2TZUC61uYt5MxBpEt5oVx8tb-mq0xxtAmfYC-ti-FD6asduVOStV5XNFlPMBWYk_6a91qVNLu6qDSJ3fb_22_48baRBzjUpvOsGaDV0QgoI1BQWxAYKBVB4DovzlU_x/s1600/twitter.png"/></a>

    <a href='https://plus.google.com/your profile' target='_blank' title="Add Us to Circles"><img src="https://blogger.googleusercontent.com/img/b/R29vZ2xl/AVvXsEj2wML6KeI90UwtKWfz0PqEWTjffFyMgJQ2Uiux7K7VgRoZbOxywE4d6HZm-J7kVxXgpbBYpNzCuGqb3ZAYfMyQhGhSxHTrvg3HGWm4VGho2EE-GnuM7W8Ux10nJOBhuyQwJMi46B0BYQGY/s1600/google_plus.png"/></a>

    <a href='http://linkedin.com/your profile' target='_blank' title="Add Us on Linked in"><img src="https://blogger.googleusercontent.com/img/b/R29vZ2xl/AVvXsEjwKblTN7c4A8ET_pz9BC8Yqm2I4IC3tGo_tjr_v25mU9aovm2CxKaij4F-J09wrppE59lZlUUPpp1X-dA51TTC4mHxN4YnhLfEW-qKXUWVxQwMH-jYApFv2TLXh9SFelSWbfrOhjLpPDG5/s1600/linkedin.png"/></a>

    <a href='http://feeds.feedburner.com/your feed' target='_blank' title="Subscribe our feed"><img src="https://blogger.googleusercontent.com/img/b/R29vZ2xl/AVvXsEgRp59jEUyYPZNrS_FG9UaxQ6m3wI1pYlyNpAkxxhsK-_NeT8LDtqh-u0nD7wk289Pu3U4Y05Tjtv7BdFhf9YVZYesqMpqc2SabhmWw0K40RsxwJGSd5M-u7157HyZi7IRenwHdL3JtjG6E/s1600/rss.png"/></a>    
          </div>
       </div><!--crawlist.net nev ends-->


    How to add this Menu
    • First log in to your Blogger, select your Blog
    • Go to 'Layout' tab then click 'add a gadget’
    • Select 'html/javascript' from Pop-up menu,
    • Copy following codes and configure

    How to configure this Menu
    • To configure Dropdown menu, first collect your links of Homepage, Labels and Other pages. And paste individual link in # by your order and change the anchor text as your requirement.
    • Menu links indicates into <!--menu-->
    • And Sub-menu links indicates into <!--submenu-->
    • If you want to add new menu link just, copy paste in order <li><a href='#'>Home</a></li> and configure
    • If you want to remove any links just delete <li><a href='#'>Home</a></li>
    • To configuring Social media profiles, First collect following profiles and replace address links on default links, indicates with red color.
    • To configure Feedburner email subscription; first collect your website's unique feed id. It can be find in this link https://feeds.feedburner.com/yourFeedId , and replace FeedId with your feed name. It red colored
    • After configuring done, save widget, save template, And check out your blog for confirm it working fine :)

    Compatibility
    • This Floating navigation menu is compatible with any default and standard designed template. If its  design breaks on any template remove it.
    • This menu is compatible with any updated Web browser.
    So what your feedback about this menu don’t forget to mention, Goodluck……

    Tuesday, March 3, 2015

    How to add Meta description to Blogger posts

    How to add Meta description to Blogger posts
    Meta description plays a vital role for Search engine and visitors both. Meta description contains site/post content’s summary version, what shows in Search result as snippet below title/link and when a person shares post on Facebook, Google plus, LinkedIn etc below title/link. A very good and explained Meta description increases the chance of more clicks through rate. So here I am explaining to beginners How to add Meta description to Blogger.

    Adding Meta description to Blogger posts


    Blogger’s Meta description set up has two different steps. Read on-

    1. General Meta description set up for site name/homepage.

    To enable and edit your site’s Meta description Go to
    • Blogger account, log in, select your blog
    • Select ‘Setting’ and select ‘Search Preferences’
    • At Meta tags, Check Yes button to ‘Enable search description’
    • And put your site’s 150 Characters Meta descriptions, Hit ‘Save Changes’
    add Meta description to Blogger posts

    This Meta description will appear for your Homepage’s search engine spinet/social media share snippet.

    2. Adding Meta description to individual posts.

    This Meta description box will appear right side of post editor while you writing a post/page.
    • Create a new post/Select a post to edit
    • Click on ‘Search Description’ from ‘Post setting’ right side of your post editor.
    • Add your Meta texts and hit done.
    add Meta description to Blogger posts

    This Meta description box in individual posts will not appear if you did not enabled Meta description of First Step.

    Confirm your Meta description is working fine

    This is an additional step, you can also check that your Meta descriptions how working on your site.
    • Search your site/homepage address on Google, and see carefully what texts appear below Title/link. If those texts are what you putted in ‘Meta description’ box, then it’s working fine.
    • Share your site’s address link on Facebook/Google plus, see what text appear on text snippet, If those texts are what you putted in ‘Meta description’ box, then it’s working fine.
    • Go to any online Meta description checker, Like ‘Seoptimer’ and make sure your Meta details working.

    Not working after all these steps done, try this

    If none of your Meta descriptions appearing even after Turing on ‘Meta description’ (Step 1), the possible reason is to be your Template does not have the Metal description maintaining code (happen sometime in customized/third party templates). So in that case adding the maintaining code will make your Meta description work.
    • Go to ‘Template’ tab, select ‘Edit HTML’
    • Search for (Using CTRL+F or CMD+F) in code snippet,

    <b:skin><![CDATA[

    • Above this code copy paste this lines,

    <b:if cond='data:blog.metaDescription != &quot;&quot;'>
    <meta expr:content='data:blog.metaDescription' name='description'/>
    </b:if>

    • And Save template.
    And make sure that your ‘Meta descriptions’ are working fine by confirming. Chill…

    Sunday, March 1, 2015

    Add Print/PDF button on Blogger blogs

    Add Print/PDF button on Blogger blogs
    Sometime some webpage we enter count as very important, and we want to save that page by printing or PDF. Doing that job instantly we basically use Printfrindly service, A free service what allows to save a webpage as PDF and Print instantly but that take little bit of work to visitors. If your webpage contains some info special you can add print/PDF button to your site very easily and that will increase your visitor engagement. And here in this tutorial I am writing about, How to add Print/PDF button to your Blogger blogs.

    Add Print/PDF button on Blogger blogs


    Printfrindly offers official button, Below you can see their button generator, Or click this link.


    • In number One step select site type ‘Blogger’
    • In number two step select button ‘style’
    • In number three step customize ‘features’
    • Hit ‘Install on Blogger’ Button. And that will take you to Blogger account-
    • After log in, ‘add page element’ and select ‘Save template’ from ‘Layout’ setting.
    The ‘Printfrindly’ button will appear below post with default sharing icons.
      If you don’t want the button below all posts with sharing icons:
      • Then from Button generator, select ‘Website’ > Choose Button > Configure > Get the codes, 
      • Copy those codes and go to your Blogger account > Layout tab > Add a gadget > Paste following codes and Drag and drop ‘widget’ to your suitable place.
      • Save Template.
        This button will appear on extremely modified Templates. 

        For those users Template does not supports/Not appearing ‘Printfrindly’ button,
        • Then from Button generator, select ‘Website’ > Choose Button > Configure > Get the codes, 
        • Copy those codes and go to your Blogger account > Template tab > Search for this line

          <div class='post-footer-line post-footer-line-1'>

          • You will find this line twice select second one and after that line paste generated code and ‘Save template’
          If Template does not contains that line/button doesn't shows up;
          • Then search </article> and paste code after </article>, ‘Save Template’
            If you don’t want to this widget to appear on Homepage:
            • Then on ‘add page element’ page select ‘Edit Content’ and before all codes copy and paste this line

              <b:if cond='data:blog.pageType == &quot;item&quot;'>

              • And below all codes copy and paste this line

              </b:if>

              • And hit ‘Add widget’ ...
              How this tutorial working on your Blogger blog don’t forget to mention. New widget and tutorial will be release soon so don’t forget to subscribe. Chill….

              Popular Posts

              Recent Posts

              YouAreHere

              Unordered List

              Text Widget

              Powered by Blogger.